JPL Print & Design Your Perfect partner in print!

Wallpaper Measuring & Fitting Guide
Self Adhesive Removable Wallpaper
This is a unique fabric made with a special adhesive, designed not to leave any damage or adhesive residue when removed. This wallpaper is favoured by those who want to install it themselves rather than having to hire a professional.
Self Adhesive Durable Wallpaper
This wallpaper is made with a high strength adhesive and a laminate to protect the print in high traffic areas. This wallpaper is best suited to commercial premises where you need a more hard-wearing material.
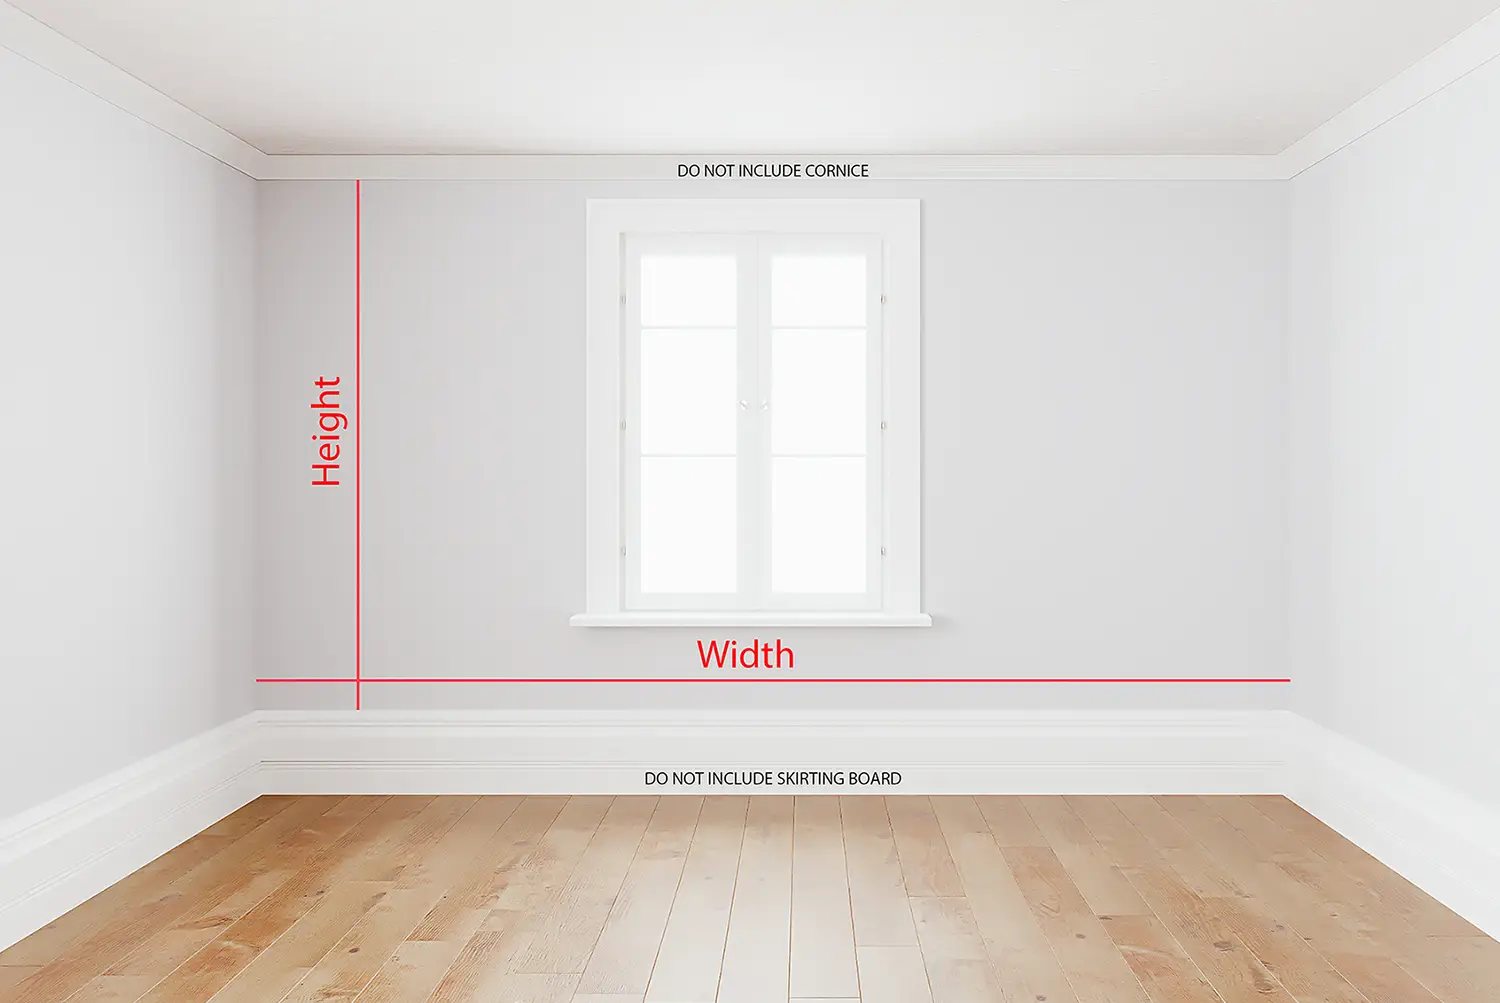
Measuring Your Wall

Few walls are truly straight so you may find you get different measurements in different areas of your wall. When measuring for your custom wallpaper we advise you to measure in a few different places, then use the greater of these measurements. This means you may have excess wallpaper but ensure your wall is completely covered. If you are struggling to find the measurements or if you are working with awkward or difficult spaces like stairwells, please call our team and we will be happy to offer advice and guidance.
Fixtures and Fittings
When measuring your wall please do not include the cornice or skirting board. Also, when measuring your wall please be aware of any fixtures and fittings that will / may affect parts of your chosen image. It is important to keep in mind that any fixtures and fittings may lead to a more difficult hanging process.
Extra Bleed
For added security we add an extra bleed to the first (left) and last (right) panel. This is to ensure full coverage of your wall. This excess can be trimmed once installation is complete.
Installation
Preparation
In preparation for hanging your wall should be bare, clean and dry. After removing any hangings, loose paint, plaster or old paper you should fill any holes and cracks with filler. You should then smooth down the surface once any repairs are set.
Sizing
Once you have prepared your wall you may want to size your walls. Sizing is a substance which you can apply to walls as part of your preparation before hanging wallpaper. This is an optional step, however sizing your wall does offer many benefits. Sizing creates a slippery, slightly glossy surface on your wall. This then makes it easier for you to move the pieces of wallpaper around as you install them, reducing the need to risk removing and reapplying. Once installed, sizing can also help the wallpaper grip the wall better. Size is also called ‘Wall Sealer.’
Start Line
Few walls are made of perfectly straight lines; this means if you were to follow your wall edge the image might end up distorted slightly. To ensure that your artwork remains straight we recommend creating a start line. To do this you will need a pencil, and a spirit level or similar tool. Use your spirit level and pencil to draw a vertical line from floor to ceiling. This may take some time however it will be worth it and make the insulation process much easier. If you have any problems with this step, please contact us. You will receive installation instructions with your order, and we will use this line as an indicator for placement of your panels.
Wallpaper Panels
Your artwork will be split into panels to create your wallpaper. To make installation as simple as possible your artwork will be split into the number of panels possible, this is to reduce the number of joins. Each panel will be labelled in the order of insulation. This is to ensure correct placement. As your custom wallpaper may be larger than normal wallpaper rolls, it may be helpful to have two people install this wallpaper.
Overlap or Double Cut Wallpaper
As standard your wallpaper panels are designed to overlap by 30mm to ensure a seamless image once installation is completed. Due to the nature of material the overlap will not be overtly obvious but if you prefer a close to seamless look you may want to double cut your panels to trim your overlap. Double Cutting is a technique used to obtain perfectly fitted seams. This is done by overlapping two panels and then cutting through both layers and then removing the excess. To trim the overlap, you will need a straightedge and a wallpaper trimming tool. Make a clean, straight, vertical cut through both layers at the centre of the overlaps. Then peel away the excess on the top then bottom layer. Smooth both layers back down, wipe down any surplus adhesive.

-
Affordable Quality
-
Fast Turnaround
-
Exceptional Support
